A Homeowner’s Guide to Roof Repairs and Insurance Claims
Experiencing roof damage can be overwhelming. Thankfully, you’re not alone in this journey. Roofing companies and insurance providers work hand-in-hand to ensure your roof gets fixed with minimal fuss. Here’s a straightforward 6-step guide to understanding this process, ensuring your next steps are as smooth as possible.
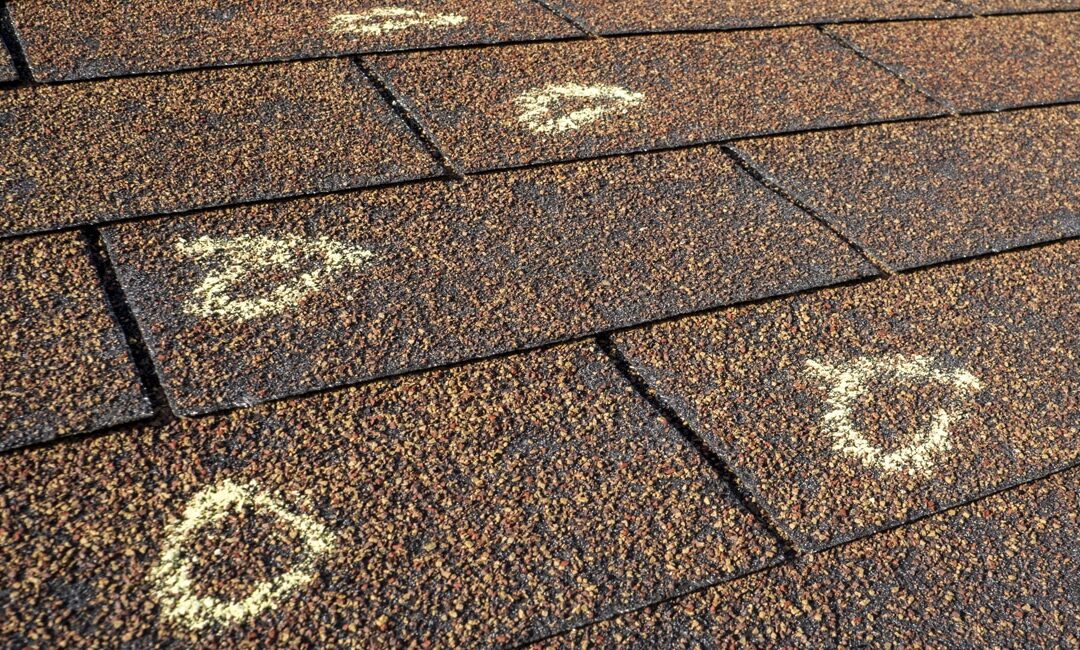
Step 1: Damage Inspection
First things first, a roofing expert will check out your roof. They’ll look for leaks, missing shingles, or any damage to give a full picture of what needs fixing. Make sure to document the damage with photos or videos, as these will be useful when filing your insurance claim. It’s also essential to keep all receipts and invoices from the roofing company for future reference.
If you’re not comfortable getting up on your roof, don’t worry! Most roofing companies offer a free inspection service, so leave it to the professional roofers in Hattiesburg MS.
Step 2: Gathering Evidence
After the inspection, it’s time to document everything. This means taking photos and videos of the damage. It’s all about gathering proof for your insurance claim. Make sure to take pictures from different angles and close-ups, as this will help your case.
Aside from photos and videos, it’s essential to gather any other evidence you may have. This could include weather reports or witness statements if someone saw the damage occur.
Step 3: Filing Your Claim
With your evidence in hand, your roofing company will help you fill out and submit your insurance claim. They’ll make sure every i is dotted and every t is crossed, so your claim goes through smoothly.
It’s essential to be as detailed as possible when filling out your claim. The more information you provide, the better chances you have of getting approval and receiving the compensation you deserve.
Step 4: Meeting the Insurance Adjuster
Next, your insurance company will send out an adjuster to take a look. Your roofer will be right there with them, making sure the adjuster understands the full extent of the damage. It’s all about getting you the coverage you need.
During this meeting, be sure to have your evidence on hand to support your claim. Your roofing company will also be there to assist in answering any questions the adjuster may have.
Step 5: The Repair Work
Once your claim is approved, the actual repair or replacement work begins. Your roofing team will use quality materials to get your roof back in tip-top shape, working quickly to avoid any major disruptions to your daily life.
Throughout the process, your roofing company will keep you updated on the progress and make sure everything is done to your satisfaction. Once completed, they’ll also provide you with any necessary documentation for your records.
Additional Tips
- Make sure to choose a reputable and experienced roofing company for the best results.
- It’s always a good idea to review your insurance policy beforehand so you know what is covered.
- Keep all receipts and documentation related to the repair work for future reference.
- Regularly inspect your roof for any potential damage and address it promptly.
- Don’t hesitate to reach out to your roofing company if you have any questions or concerns about the repair process.
Step 6: Final Check and Clean-Up
After the work is done, your roofing company will do one last check to ensure everything is perfect. They’ll also clean up any mess, leaving your property looking great.
Before you make the final payment, take a close look at the repairs to make sure everything is up to standard. If there are any issues, address them with your roofing company immediately.
Once you’re satisfied with the work, pay your contractor and keep all receipts for future reference. It’s also a good idea to reach out to your insurance company and provide them with documentation of the repairs for potential reimbursement.
Regular Roof TLC
Don’t forget, roofs need love too! Regular maintenance can prevent future damage. Many roofing companies offer maintenance services, helping keep your roof in great shape and potentially saving you money down the line. Make sure to schedule regular inspections of your roof and address any issues promptly.
In addition, it’s important to clear any debris or buildup on your roof, as this can cause damage over time. Trimming nearby trees and ensuring proper drainage can also help prolong the life of your roof.
Choosing the Right Roofing Partner
Picking a reputable roofing company is key. Look for experience, good reviews, and clear communication. They should also be licensed and insured, offering warranties for their work. This partner will not only fix your roof but also guide you through the insurance maze. Don’t hesitate to get multiple quotes and compare services before making a decision.
When Disasters Strike
With the rise of natural disasters, it’s crucial to have a roof that can withstand the elements. A good roofing company can advise on the best materials for your area and help you understand your insurance coverage options. In the event of a disaster, make sure to document any damage and contact your roofing company as soon as possible.
Your Deductible: The Only Out-of-Pocket Cost
Understanding your insurance deductible is important. This is the amount you’ll need to pay before insurance covers the rest. Make sure it’s an amount you’re comfortable with. If you have a higher deductible, it may be worth considering setting aside money in case of an emergency.
Final Thoughts
Navigating roof repairs and insurance claims can be daunting, but with the right information and a trusted roofing partner, it doesn’t have to be. By keeping regular maintenance on your radar and knowing the ins and outs of your insurance policy, you can protect your home and your peace of mind. Remember, the roof is your home’s first line of defense, so don’t neglect it and always be prepared for unexpected events. Stay safe and happy roofing! Be sure to also check out our other articles on home maintenance and tips for keeping your house in top shape. Your home is an investment, so take care of it and it will take care of you.
A special thanks to River Oaks Roofing for providing the article. Get directions
Where to Start When Choosing Roofing Materials in 2022

Architectural shingles and architectural laminated shingles will eliminate the time-consuming task of roof replacement. Not only will you save money on maintenance and possibly avoid having to replace your roof entirely, but you will also save money by using a product that lasts longer due to its ability to withstand winds and storms longer than traditional shingles.
While any roofing material can withstand heat exposure, fire-resistant products may add significantly to its durability. Mopped with sufficient insulation, the premium fire-blight resistance of architectural roofing shingles will keep your home cooler than a traditional roof with no added insulation. Because you only have one roof, you may not have a second option with some products. Architectural shingles will require only routine maintenance for their service life. Longer life expectancy. Better quality products are far more durable than standard roofing materials. You will not have to replace your roof frequently if it has a longer life span. This reduces the material and the time required to complete a new roof.
With an extended lifespan and the toughness of the asphalt, you will almost certainly never have to worry about both the elements and the passage of time. There is no need for extensive work. Your qualified roofing contractor will not need to guarantee or perform extensive work to install these superior shingles. Reminiscences Story to rounds repeated Le Rocher; once the roof is down, you can sit back and relax. Architectural shingles are environmentally friendly and emit no toxic Formaldehyde.
Reduced heat dissipation means lower energy costs. You will reduce energy costs by preventing heat from radiating through your home’s roof. Examine the thermal models of the products and their effects on the temperature of your home throughout the season. Capable of meeting current building code requirements These galvanized roofing products are incredibly versatile, allowing for varying slope and pitch. Many products include cost-effective hooks or clips that aid in installing lap banding while meeting all current building code requirements.
Roof Leaks? How to Assess Your Roof Damage: DIY

Although most new homes are covered with asphalt shingles, the life of your roof can last up to 15 years, but the most common reason homeowners call for a leak repair is a seam break. Allow 2-3 years for the warranty if you live in a new home before the roof is finished. A professional roofing company should inspect the existing roof to determine if there is a possible water penetration due to weather or a roof repair on your home. There are three areas to look for if a seam flaw is discovered. First, inspect a straight wall from the ground as far as the leak is possible across the seam. If there is no visible bubble, the roofing company did a good job. The second thing to look for is the missing or curled roll of asphalt shingles.
An EM region (a large area similar to the name recognition area to show where an EM is to be located, typically icons or shapes near the downspout on a roof) is the outside area that connects to the otherwise equal size on the ground. Using a level, check the EM area. If it is almost vertical, that indicates a potential vulnerability.
Blown-in asphalt shingles are difficult and expensive to repair, so most professionals cover the area with felt paper or other temporary repairs. However, once the leak has been identified, you can begin fixing it.
A lay-on felt grit system designed to fall under the weight of the surrounding shingles is the most common type of asphalt roof. After inspecting the gutter, walk around the gutter’s edge and look into the gutters. Make sure your shoes are wet. If you feel a gap in the gutter, a pipe inside your wall is leaking.
Once you’ve identified the source of the leak, it’s time to fix it. First, use a spacer to seal the seam with a good quality clear tar caulk (it can also be caulked around a window). Then, cover the seam under the tear in the gutter with a good-quality spray roofing underlayment. Apply the seal with a blow torch and keep applying more seals until the leaks are covered. Allow it to dry for 1-2 days before installing brand-new, beautiful asphalt shingles similar to the ones you purchased. If you want to repair the leaks, you should seek advice from a reputable roofing contractor.
If you have doubts about your ability to repair and replace roofing materials, contact a professional roofing contractor immediately. The work could be dangerous even to discuss, and if your home is an older structure, but you are a homeowner, you may subsidize the entire cost of the work to repair your roof.